Shrimp and Grits

One of my best friends got me The Southerner’s Cookbook for Christmas. Produced by the editors of Garden and Gun magazine, the book is pretty enough for my coffee table… and it features essays by some of my favorite Southern food writers. I’ve had fun trying out some of the recipes, and will try to post more in the next few weeks.

And with the school year getting back into swing, we’ve needed some weeknight recipes that are ready in under 30 minutes but still brighten up these dreary winter nights. This had an amazing depth of flavor and even my pickier kid devoured it. I used frozen Gulf shrimp and it turned out better (and quicker!) than I dared hope.

I streamlined the recipe quite a bit (and left out the mushrooms, because my 13 year old can’t even. Just ask him.)

Ingredients:

  • 4 cups chicken or shrimp stock, divided
  • 2 tablespoons butter, divided
  • 1 cup grits
  • 1/2 cup finely shredded Parmesan
  • 2 ounces sliced bacon
  • 1 tablespoon olive oil
  • 1/2 small yellow onion, diced fine
  • 1 tsp minced garlic
  • 14 1/2 ounce can peeled whole tomatoes
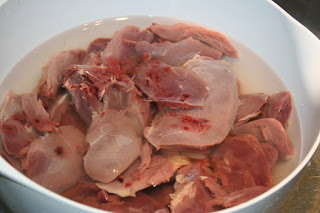
  • 1 lb shrimp, peeled and deveined and thawed (if frozen, which is what I used)
  • 1/2 tsp Cajun seasoning, such as Tony Chachere’s
  • Juice from 1/2 lemon
  • Hot pepper sauce, such as Tabasco

Method:

In a large saucepan, bring 3 ½ cups salted stock to a boil.  Add the butter and then pour the grits in a steady stream while continuously whisking. Reduce the heat to low, cover, and cook for 20 minutes, stirring occasionally.  Stir in the Parmesan and add salt and pepper to taste.

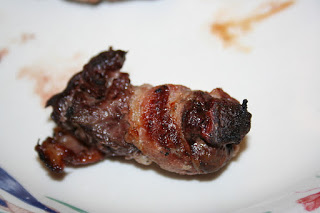
Meanwhile, place a large cast-iron skillet over medium-high heat. Cook the bacon until the fat has rendered and the bacon is crisp.  Remove the cooked and set aside.  Drain a little of the bacon fat (about half) and add a little olive oil to the pan. Sauté the onion until it is translucent and soft.  Add the garlic and cook for about a minute. Drain the tomatoes and break them apart with your fingers.  Add them to the pan and cook for 5 – 7 minutes.

Sprinkle the shrimp with cayenne and add them to the skillet. Cook until they are pink and opaque, about 3-4 minutes.  Add the lemon juice, the remaining ½ cup of stock, hot sauce to taste, and 1 tablespoon butter. Cook for 2-3 minutes until warmed through.

Spoon the grits into bowls and top with the shrimp.  Garnish with crisped bacon, if desired.  (This is not pictured, since my kids can smell bacon from a half mile away and had demolished the garnish before the grits were finished).  Enjoy!

Adapted from “Shrimp and Rice Grits,” from The Southerner’s Cookbook, by the editors of Garden and Gun.

Pumpkin Cheesecake

*Recipe updated with better pictures and streamlined instructions*

(Also, the primary helper has switched from the oldest to the youngest!)

The first time I made this cheesecake it was for an LSU game… and it was also the day I bought my first LSU shirt. 

I’ve always liked the Tigers — it’s part of living here — but I never attended LSU, and neither did any of my 4 siblings, or my husband, so I never really got around to buying a shirt.  But when we were invited to watch “the game of the century” with some friends (and once, I inadvertently dressed my son in the opposing team’s colors), I decided to go shopping for both of us. That way, no one would make him stand on the porch if LSU happened to get behind.

The Tigers beat Alabama, and the dessert was pretty good, too.

The best part of this cheesecake might be the crust.  When reading over cheesecake recipes (all of which seemed to use a graham cracker crust), I thought, why not ginger snaps?  Same cookie crunch, but lots more fall flavors.

Here’s the recipe (adapted significantly from Smitten Kitchen)
Note: this recipe is not difficult, but it gets lots of bowls dirty… so clear out your dishwasher before you get started.

For the crust:

  • 3/4 cup gingersnap crumbs (20 cookies – Anna’s Ginger Thins are the absolute BEST for this)
  • 1/2 cup pecans
  • 1/4 cup brown sugar
  • 1/4 cup white sugar
  • 1/4 cup (1/2 stick) melted and cooled butter

For the filling:

  • 3 (8 oz) packages cream cheese, at room temperature (this is very important!)
  • 1/2 cup packed light brown sugar
  • 1/2 cup white sugar
  • 2 tablespoons heavy cream
  • 1 teaspoon vanilla
  • 1 tablespoon bourbon (optional)
  • 1 tablespoon cornstarch
  • 1 1/2 teaspoons cinnamon
  • 1/2 teaspoon nutmeg
  • 1/2 teaspoon ground ginger
  • 1/2 teaspoon salt
  • 1 (14 oz) can pumpkin (1 1/2 cups)
  • 3 eggs at room temperature

For the topping:

  • 1 cup heavy cream, whipped until stiff peaks form
  • 3 Tablespoons powdered sugar OR 3 tablespoons real maple syrup (did this the last time and it was an amazing change)
  • 1 1/2 tsp cinnamon
  • 1/2 tsp ginger

Procedure:

  • Make the crust: Combine first four ingredients in the bowl of a food processor.  Add melted butter.  Press into a greased springform pan.
  • Make the filling: Put the cream cheese and sugars in the bowl of a mixer.  Beat on high for 3 – 5 minutes until very smooth.  Add the other ingredients in the order listed, beating well after each addition.  Add the eggs one at a time, beating well after each. Do not overbeat after adding the eggs.
  • Pour this into the springform pan on top of the crust.  Bake at 350 for 50 minutes, then turn off the oven BUT DON’T OPEN it. 
  • Allow the cheesecake to cool in the oven for at least an hour (I always let mine stay there overnight).  Remove and refrigerate for at least 2 hours.  Bring to room temperature before serving (and topping). 
  • Make the topping: beat the heavy cream on high until stiff. Add the sugar and spices into the whipped cream, scraping down the bowl frequently. 
  • Either serve alongside the cheesecake in a bowl or pipe on top of the cheesecake (if you are worried about unsightly cracks).

This would be perfect for a different Thanksgiving dessert.  Enjoy!

Also note that the bottom of the springform pan can be placed directly onto a cake pedestal to serve, as shown below!

*I still have trouble with this cake splitting.  I have tried putting a pan of water underneath it in the oven, and decreasing the temperature by 5 – 10 degrees, with occasional success.  Thank goodness for the topping, which hides the cracks!

*A note about ingredients: lots of people ask me about what brands I buy for this cheesecake.  The only ones that seem to make a difference are the gingersnaps (I love Anna’s Ginger Thins) and the cream cheese.  I buy Philadelphia for this.  I think the generic brand has too much water, so it doesn’t have as smooth of a texture. I usually use Libby’s pumpkin; just make sure you buy the plain pumpkin puree, not the pumpkin pie filling.  I also do not toast the pecans first (as I do in most desserts) because they get plenty brown while the cake cooks.  Also, if you do substitute maple syrup for powdered sugar in the topping, make sure to use the real stuff, not maple-flavored corn syrup 🙂  Happy Turkey Day!

Banana Pancakes

June 24

My oldest returned from a week at Boy Scout Camp this weekend.  When I asked him what he missed, he answered “my cat” first, and “you,” second… but I suspect that really he meant, “I missed your food.” 

His request for his first morning back with air-conditioning and electricity? Banana Pancakes.

Of course, we are pretty opinionated about pancakes at this house.  I don’t like the powdery taste of the mixes, although my kids would probably eat cardboard if you covered it in enough maple syrup.

My husband likes “fluffy” pancakes; I like mine to be more like crepes… thin, small, slightly crisp around the edges, and so light that even three or four pancakes doesn’t condemn me to a morning of sluggishness.  

Also, certain members of the family like their pancakes stacked into tipsy columns and covered with syrup… but the rest of us know that they are so much better dipped.

Either way, we hope these become a family favorite for you, as well.

Adapted from the Williams Sonoma Children’s Cookbook

Ingredients:

  • 1 1/2 cups all purpose flour
  • 2 tablespoons white sugar
  • 1 tablespoon baking powder
  • 1/2 tsp. salt
  • 1 medium or 2 small over-ripe bananas (brown is good), mashed gently
  • 1 1/4 cups milk
  • 2 eggs, beaten
  • 1/2 tsp pure vanilla extract
  • 3 tablespoons butter, melted
  • More butter for cooking

Procedures:

In a mixing bowl, whisk together the dry ingredients.  In a separate bowl, combine the mashed banana, eggs, milk, and vanilla, and stir until combined.  Pour the wet mixture into the dry mixture, and fold until combined.  Do not overmix or your pancakes will be flat!  Gently stir in the melted butter. 

Heat a griddle or skillet until hot.  Melt a pat of butter in the skillet and swirl to cover the surface.  Spoon 1/4 cup (or slightly smaller) portions of batter into the skillet.  When bubbles in the middle of the pancakes no longer pop, it’s time to flip them.  Cook on the remaining side for 1-2 minutes (typically, half the time it took on the first side).  

You can keep pancakes warm in the oven, but at my house, they disappear as fast as I can flip them onto a plate.

Another reason we love this recipe?  It technically serves 6, which means that I can pour the last of the batter into a mason jar and store it in the fridge for a busier morning.  The refrigerated batter will last up to 2 days, and you may have to add a little milk.

Enjoy! 

Bacon-Wrapped Duck Breasts

June 24

If the pick-up truck parked in your driveway has ever looked like this, then you probably already have some variation of this recipe, but just in case…

I was first introduced to this appetizer over a decade ago by my husband’s then-roommate, John, who was, and is, a consummate duck hunter. But most of the hunters I know seem to have some iteration.  I think it’s a favorite because wild duck is usually a little gamy and is extremely lean.  The marinade helps a lot with the gaminess — as does rinsing the meat well and soaking it in water until the water runs clear — and the bacon keeps the lean meat from drying out during cooking.  Plus, everything is better wrapped in bacon!

Before you begin, have your favorite hunter breast the ducks for you, preferably outside.  Rinse them several times, then carefully examine them make sure that all of the shot gun pellets are out — biting into steel shot is a good way to break a tooth.

Soak them in cold water for a few hours, then put them to marinate.

After a few hours, take the breasts out of the marinade and pound them flat.  This process is neater if you place the breasts in a plastic bag first.  Flatten to approximately 1/2 inch. Spread the flattened meat with softened cream cheese and 1-2 jalapeno slices.  Roll the breasts tightly, then wrap in bacon and secure with a toothpick. 

Grill over medium heat until the bacon is cooked through. 

Ingredients:

  • Breasts from 6-8 ducks
  • 1 lb thin bacon
  • 1/2 block of cream cheese
  • Pickled or fresh jalapeños

Marinade:

  • 1/4 cup extra virgin olive oil
  • 1/4 cup Lea & Perrin’s Worcestershire sauce
  • 1/4 cup red wine
  • 2 cloves crushed garlic
  • 1 tsp Kosher salt
  • 1/4 tsp red pepper
  • 1/2 tsp black pepper

Procedure: 

Clean and rinse duck breasts until the water runs clear.  Combine the marinade ingredients and add the meat.  Marinade in the refrigerator for approximately 6 hours, or overnight. 

Remove the breasts from the marinade and place them, individually, into a plastic bag.  Using a meat mallet or heavy skillet, pound the breasts flat. Spread the flattened breasts with softened cream cheese and sprinkle a few jalapeños, if desired.  Roll the breast tightly and wrap in one piece of bacon, securing with a toothpick. 

Grill over medium-high heat until the bacon is cooked and the duck reaches a temperature of approximately 140°F(for medium rare). We’ve also had luck cooking these in a grill pan on the stove, and even in a 400°F oven. 

 Enjoy!

Peanut Butter Cookies

June 25

My husband loves peanut butter cookies.  It’s always seemed an odd “favorite cookie” choice to me, what with all the chocolate in the world.  I used to think it had something to do with the fact that when we were newly-weds, my then-teenager brother was notorious for stopping by and devouring (as only teenage boys who play 4 sports can) everything in the house.  But he has a mild peanut allergy, so these cookies were always safe. 

Now my youngest claims that these are his favorite cookies, too, because “peanut butter AND brown sugar…. obviously!”  Although I would argure, I’ve rarely seen that kid turn down any cookie fresh out of the oven (he gets that part from his mom).

Whatever the reason, these are my go-to recipe for when I have a particularly enormous “honey-do” (finish the back porch)… or to get out of trouble (yes, I broke the boat while you were out of town… and it needs to be fixed before my sister comes in from South Carolina… but don’t forget about the back porch!). 

These cookies are very kid-friendly.  And the pictures of my babies helping me make them while they were still babies… well, in case I needed more motivation to update the blog, I need to look no further.  But oh… my old kitchen!  So much yellow bathroom tile!

Ingredients:

  • 1/2 cup butter, at room temperature
  • 1/2 cup white sugar
  • 1 cup brown sugar
  • 1/2 cup + 2 tablespoons peanut butter (crunchy)
  • 1 egg
  • 1 1/4 cups all purpose flour
  • 1/2 tsp baking powder
  • 3/4 tsp baking soda
  • 1/4 tsp salt

Procedure:

Cream butter, sugars, and peanut butter.  Add beaten egg and mix well.  Sift and stir in flour, baking powder, baking soda, and salt. 

Chill the dough.  If you are OK scooping dough (see above), 15 minutes will be enough.  If you want to be able to roll out the cookies and give them the characteristic cross hatch pattern, chill for at least 2 hours (overnight is fine, too). 

Roll into 1 inch balls.  Place 3 inches apart on a baking sheet lined with parchment paper or ungreased baking stone.  Flatten criss-cross fashion with a fork.  Bake in a 350 oven for 10-15 minutes (depending on the size of the cookie).  Cool for a few minutes on baking sheets before removing to a cooling rack or a brown paper bag. 

Enjoy! 

Sandwich Bread

June 29

My husband referred to “store bread” fairly early in our relationship.  As in, he was going to make a sandwich on “store bread.”  As if there was another kind?  I mean, didn’t all bread come wrapped in plastic from the store?  Apparently not in the house where he grew up.

As I saw it, I had a choice to make.  I could either get him used to an exclusive diet of store bread, or I could learn how to make bread. And I love homemade bread.

My mother-in-law helped in this decision by giving me her bread machine (she got a new one), and the recipe for her “Basic Bread” – be warned… it’s addictive.

Ingredients:

  • 2 1/2 teaspoons yeast
  • 4 cups bread or all purpose flour
  • 3 tablespoons sugar
  • 1 teaspoon Kosher salt
  • 3 tablespoons butter or margarine
  • 1 1/3 cups water

Procedure:

Mix all of the ingredients.  You can use a bread machine, a mixer with a dough hook, or your hands (I’ve never tried that last one).  My preferred method? The bread machine on the dough cycle.

Let rise until doubled – 1.5 to 2 hours.  Punch down the dough and divide it in half.  Place each half in a greased, floured loaf pan.  Allow to rise again for 30 minutes. 

Bake in a 375 °F oven for 20 minutes (until nicely browned).  Let cool before slicing.

This bread is fabulous for so many things… but my favorite may be a tomato sandwich.

Enjoy!

Flag Cake

June 30

I love to make desserts.  And I have a LOT of favorites: strawberry pie and peach raspberry crumble top the list this time of year. 

My sisters have their favorite: chocolate angel mousse pie (here’s the old link… a new one is coming soon!)

My brother and dad also share a fondness for cheesecake. 

But when some of my best friends moved to Pennsylvania two years ago (sniff…), and I offered to make any dessert for their going away party, I was more than a little suprised when the request was “Flag cake.” 

“Flag cake?” I asked

“Yeah, that one you make on the Fourth of July!” my friend said.

So for a going away party in September… we had Flag Cake.  

I mean, it made sense… they were moving to Philadelphia: Independence Hall, the Liberty Bell, the Constitutional Convention.  Plus, what’s not to love about a delicious yellow cake with a perfect crumb, topped with cream cheese icing and fresh fruit?

So for the 4th of July, or any time you are feeling a little patriotic:  

Ingredients:

For the cake:

  • 2 1/4 sticks butter at room temperature
  • 3 cups sugar
  • 6 extra large eggs, room temperature
  • 1 cup sour cream, room temperature
  • 1 1/2 tsp vanilla extract
  • 3 cups flour
  • 1/3 cup cornstarch
  • 1 tsp Kosher salt
  • 1 tsp baking soda

For the icing:

  • 4 sticks unsalted butter at room temperature
  • 1 1/2 pounds cream cheese at room temperature
  • 1 pound powdered sugar
  • 1 1/2 tsp pure vanilla extract

To decorate:

  • 1/2 pint blueberries
  • 1 pint of red fruit – I have used strawberries, pitted cherries, and raspberries.: 

Procedure: 

Preheat the oven to 350°F. 
Spray an 18 x 13 x 1 1/2 inch sheet pan (I like Baker’s Joy or Pam with Flour).
Cream the butter and sugar in an electric mixer until light and fluffy (this takes longer than you think — 4-5 minutes on high).  Add the eggs two at a time, beating between, then add the sour cream and vanilla.  Scrape the sides and mix again.

In a separate bowl, sift together the flour, cornstarch, salt, and baking soda.  With the mixer on low, add the flour mixture to the butter mixture until just combined.  Pour into the sheet pan and smooth.  Bake for 20-30 minutes until a toothpick comes out clean.  Allow to cool completely.

For the icing, combine the butter, cream cheese, sugar, and vanilla in an electric mixer.  Having the ingredients room temperature is important!

Take approximately a cup of the icing and put it into a pastry bag fitted with a star tip (while you can use a Ziploc bag with the tip cut off, these always explode on me, and I think it is worth the $8 the next time you are ordering from Amazon or at Michael’s). 

Spread the remaining icing on the cooled sheet cake. Outline a square in the upper left corner with blueberries.  Place two rows of red fruit (raspberries, strawberries, etc.) across the top of the cake to form the first red stripe.  Space an inch or two down and make a second row.  I only had room for three rows of red on this cake because the raspberries were big! 

Once you’ve placed the fruit, go back and add stars to the tops of the blueberry section, and white stripes between the raspberries/ strawberries.

Enjoy! 

Black Bean Corn Salsa

July 2

The Fourth of July is my favorite “eating” holiday.  Even better than Thanksgiving or Christmas — at least when it is not too hot.  All my favorite things are in season. 

We start the morning off with a bike parade in Triangle Park, and then, for the past fifteen years, give or take, we’ve been lucky enough to be invited to celebrate with great family friends.

The boys get to swim in the bayou…

sometimes do a little fishing…

or just hang out on the dock…

and enjoy the best food ever!

The menu features so many of my favorites: baked beans, grandmother rice, corn off the cob, homemade peach ice cream, chicken and ribs, plates of fresh tomatoes and cucumbers lightly dressed.

A few years ago, I had a bunch of tomatoes and jalapeños from our garden, begging to be used, so I made this dip, adapted from one of my favorite cookbooks – the Houston Junior League’s Stop and Smell the Rosemary.

Ingredients:

  • 2 (15 oz) cans of black beans, drained and rinsed
  • Kernels from 3 ears of corn, cooked (you could use 1 1/2 cups frozen, thawed corn, but I just threw the ears on the grill the night before and cut the kernels off)
  • 3 medium firm tomatoes, peeled, seeded, and diced
  • 1/2 cup fresh cilantro, minced
  • 3 fresh jalapeños, seeded and diced
  • 1/4 cup fresh lime juice (2 very juicy limes… but if your limes are kind of dry, you may need 3)
  • Kosher salt
  • freshly ground black pepper
  • 3 avocados, pitted, peeled, and diced

Procedure:

Combine all ingredients except avocados, tossing well.  Cover and chill.  Just before serving, cut and toss in the avocados.  Serve with blue corn tortilla chips (or really any tortilla chips – my kids ate it with a spoon!)

Happy Independence Day!

Brownies Without The Box

July 16

For someone who has always shied away from box cakes (I can make my mom’s faster than I can go buy the box), I’ve always been deathly afraid to make brownies without a box.

I was scarred (not physically, thank goodness) very early in life by brownies.  One afternoon I was babysitting my younger sisters and brother and they asked for brownies.  Since we didn’t have a box on the shelf, I decided to start from scratch.  I was 14 at the time and more than a little overconfident about my cooking abilities.  I mean, if I could make Kraft Mac and Cheese (this was before the kind in the cups), surely brownies were not beyond my reach. 

I pulled out my mom’s copy of Celebrations on the Bayou and decided to go for the ambitious sounding “Swamp Bottom Brownies.” 

To this day, I’m not quite sure where I went wrong.  Maybe I substituted baking soda for baking powder, or a tablespoon for a teaspoon.  Or maybe both.  Or maybe my mom had TNT powder stored on a shelf in her pantry.  Whatever the cause, my creation exploded in the oven.  Literally.  There was baked-on, exploded brownie on every square inch of surface in my mom’s oven.

Needless to say, after 2 cans of Easy Off Oven Cleaner and almost an hour on my knees leaning in and scrubbing, I decided box brownies were all anyone every really needed.

That, and my oven was going to be at shoulder level – not down near the floor.

So why the change?  Well, we are approaching the one year anniversary of the start of this blog, and part of my goal was to challenge myself in the kitchen.  After all, this whole thing started because I had never made pickles before, either.  So I decided to tackle the beast – brownies.

Plus, there were some really cute boys around who spent an afternoon exhausting themselves – they needed some chocolate.

Ingredients:

  • 2 sticks unsalted butter
  • 12 ounces plus another 1/4 cup of semisweet chocolate chips
  • 3 tablespoons hot brewed coffee
  • 3 extra large eggs
  • 1 tablespoon vanilla
  • 1 cup sugar
  • 3/4 cup flour
  • 1 1/4 tsp baking powder
  • 1 tsp salt
  • 1 cup chopped, toasted pecans or walnuts (optional)

Procedure:

Preheat oven to 350°F.

Butter and flour (or Baker’s Joy) a 12″ casserole.
Melt butter and 12 ounces of chocolate chips over simmering water. Add the coffee.  Allow to cool slightly.

In a large bowl (not a mixer) stir together the eggs, vanilla, and sugar.  Stir the warm chocolate mixture into the egg mixture.  Allow to cool to room temperature. 

Stir in the flour, baking powder, and salt.  Add the remaining chocolate chips and nuts (if using).  Pour into the casserole and bake at 350°F for 15 minutes, until a toothpick comes out clean.  Do not over bake!

Enjoy!

Smoky Eggplant Dip (“Moutabbal”)

July 16

We have apparently reached the age of the insanely busy summer.  I seem to spend my life in the car, shuttling boys from Vacation Bible School, to tennis lessons, and then to baseball camp — and my kids don’t even do travel ball!  Or even more strangely, I find myself alone for whole chunks of time while the boys ride bikes with friends to the pool or the bayou.

My summer schedule has been crazier than usual, too, since ACT (in all their infinite wisdom) added a July test, in addition to the traditional June one.   So for the first time in almost a decade, I have worked for all but a few days. 

Luckily, though, we’ve been in town, and my husband has been working overtime in the garden, too.  The eggplants, in particular, have been amazing this summer.  

And this dip?  The perfect thing to enjoy on a back porch or dock, with a glass of cold white wine for contrast. 

Ingredients:

  • 2 large Black Beauty eggplants (may combine with Ichiban) (approximately 2 lbs by weight
  • 2 Tablespoons olive oil
  • 1 tsp coarse salt
  • 4 Tablespoons tahini paste
  • 2 Tablespoons minced garlic
  • Juice of 1 large lemon
  • 1/4 tsp cayenne pepper
  • 1/2 tsp cumin
  • 1 Tablespoon Greek yogurt (optional)
  • 8-10 mint leaves
  • 8-10 basil leaves

Procedure:

Heat oven to 375°F. 

Prick eggplants with a fork and char the skin (on a grill or over a gas flame) until almost no purple remains.  This step is optional, but increases the smoky flavor. 

Brush a foil-lined baking sheet (for easy clean up) with one tablespon of the olive oil.  When the eggplants have cooled, trim the stem and cut in half lengthwise.  Sprinkle the cut side with salt and turn the eggplants cut side down on the baking sheet.  Bake for 30-35 minutes.  Let cool to room temperature. 

Using a spoon, scrape out the pulp into the bowl of a food processor (it’s ok if a little of the skin makes it into the food processor). Add tahini, lemon, cayenne, cumin, yogurt (if using), mint, and basil.  Pulse until combined. 

Add more salt and lemon, if needed. 

Garnish with olive oil, paprika, and chopped mint or basil, and serve with pita chips or pita bread cut into wedges. 

Enjoy!