Penne a la Vodka

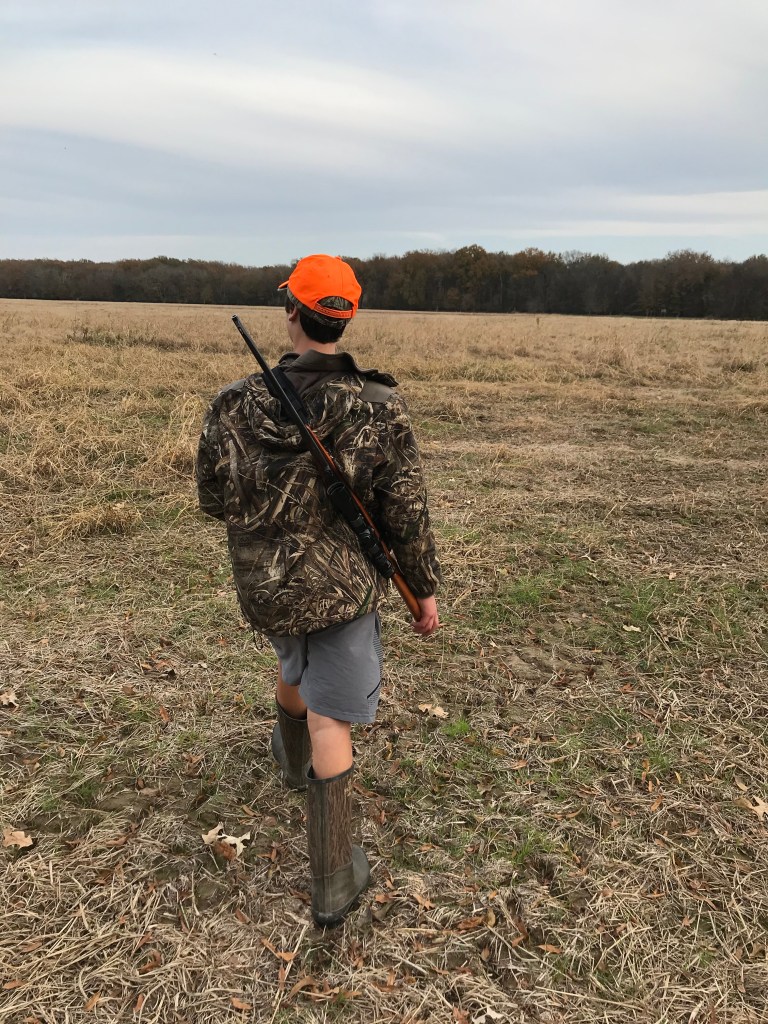
Today, our yearbook sponsor photographed the class favorites. This day always makes me smile because there is so much overlap between the categories. Most atheletic is also a valedictorian. Most school spirit has awesome style and is also brilliant. And so many of my students not there today show so many of these traits, too — they are athletic, talented, friendly, stylish, beautiful, full of school spirit, and likely to succeed.

In the 90s, that’s what my small class chose for me — “Most Likely to Succeed.” I’m still as intimidated by that label in my 40s as I was at 17. Succeed at what? If my classmates knew then that I’d become a school teacher and move back to our hometown (neither was in the original game plan), would they demand a recount? So many of the students posing around the fountain today are much more intelligent and accomplished than I ever thought of being at 17.

But I left thinking about my two “friendliest.” Quarantine is hard on everyone, but it is harder on the friendliest among us. Today was the first time I’ve ever seen one of these kids not hug her friends. However, friendly, when it applies to these two, doesn’t necessarily mean outgoing (although they can be that, too). Instead, “friendly” seems to be high school’s way of saying “kind.” These kids, like so many of the teenagers I teach, have giant hearts. They show this in ways small and large. Yes, they volunteer around our community and care about big issues, but they also actively look for ways to make people’s days brighter in small ways — every day. And they are not alone.

When I think of the truly successful adults I know, they also frequently show this relentless kindness. Sure, intelligence helps, and hard work is indispensable. But showing that you think of other people and doing little things to make their days better? That’s the success to which I aspire.

Which brings me to this pasta…

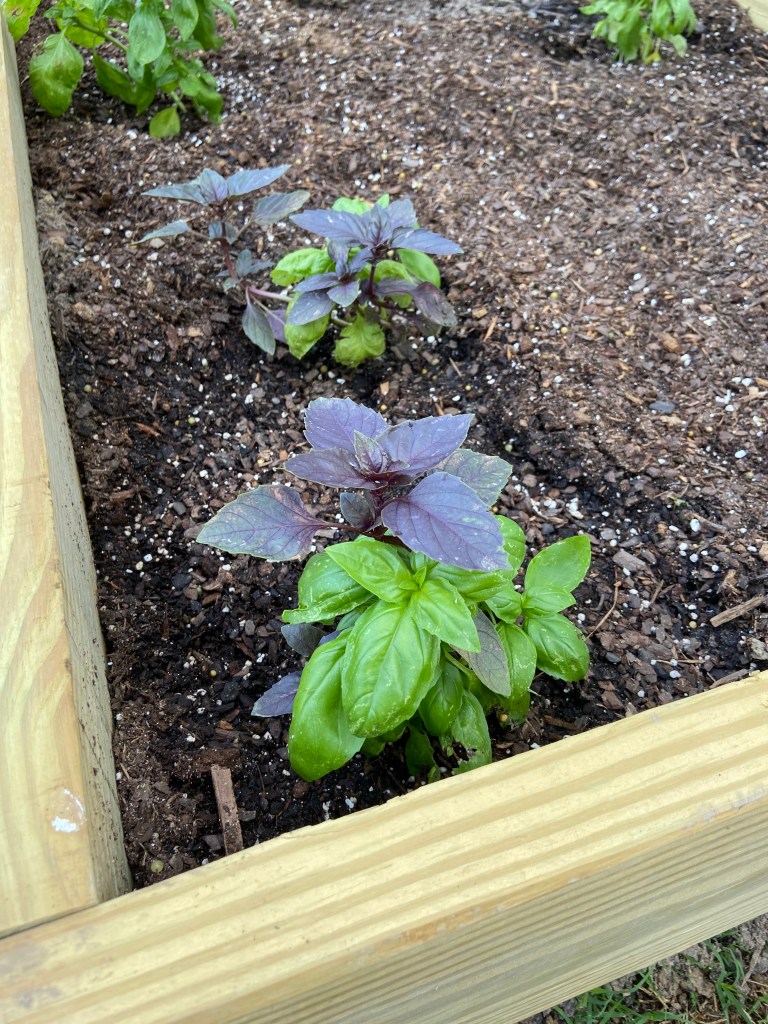
This is a summer favorite around here, but it requires a lot of fresh basil. And it’s early in the basil season, so we haven’t had it since last summer.

One of my best friends heard me mention that we had killed our basil seedlings. While she was out, she saw some basil plants and brought them to me. I was indescribably happy when I saw her standing in my yard, basil plants in each hand. It’s these small acts of kindness and thoughtfulness that make her one of the most successful people I know.

Penne a la Vodka (adapted from Ina Garten and an Italian restaurant I loved in college, but whose name I don’t remember)

Ingredients:

  • 2 Tablespoons olive oil
  • 1 onion, chopped
  • 1 Tablespoon minced garlic
  • 1 teaspoon dried oregano
  • 1/2 teaspoon red pepper flakes
  • 8 oz white button mushrooms, sliced (optional)
  • 1/2 cup vodka
  • 1 (28 ounce) can crushed tomatoes
  • 1/2 pound penne pasta
  • 1 cup fresh basil leaves, chopped
  • 1/2 cup heavy cream
  • 1/4 cup freshly grated Parmesan, plus extra for serving

Procedure:

  • In a heavy skillet, heat the oil. Add the onions and a pinch of salt and cook over medium high heat for 6-8 minutes, until translucent. Add the garlic, oregano, and red pepper, and cook for one minute.
  • Add the mushrooms and cook for 8 to 10 minutes, until their liquid begins to release.
  • Add the vodka, tomatoes, and salt. Simmer for 40-45 minutes. (This means the alcohol cooks out and you can serve it to your kids).
  • When the sauce is almost done, bring a large pot of well-salted water to a boil. Add the pasta and cook until it is al dente (you want it a little firmer than usual because it will cook a bit more once you add the sauce.)
  • While the pasta is cooking, add the fresh basil and cream to the tomato sauce. Bring the sauce back to a simmer, but do not boil. Cook for 8-10 minutes, until thickened. Taste and adjust the seasonings as needed (I usually need to add a little more salt and black pepper).
  • Drain the pasta, reserving a bit of the pasta water (about 1/2 cup, usually).
  • Add the pasta to the sauce and cook for 2-3 minutes, adding the pasta water to thin as necessary.
  • Off the heat, stir in the parmesan. Serve this hot with extra fresh basil and extra parmesan.

Blueberry Muffins

The hardest part of writing this blog is probably not what you’d think. It’s not the cooking or the writing — I love both of those things. It seems like I have a continual backlog of recipes I can’t wait to share, and an equally long list of things I want to try. And last winter, I got a few of my students to update my website, so now even the technical stuff isn’t too bad.

But taking pictures where stuff actually looks edible, much less tasty? Turns out food photography is the bane of my blogging existence. Take these blueberry muffins. In the first pictures I shot of them, they looked green. And unlike Sam-I-Am, I remain unconvinced about green breakfast food.

Other than the actual food, there are the background issues: Are my surfaces relatively clean? Are the cabinets closed? Are the people in the background fully clothed? (See also, Zoom meetings).

When I read online articles, other food bloggers rave about their natural light. So I tried that last week with a batch of cupcakes. It looked like I was inexplicably taking the cupcake on an adventure into the jungle.

Jungle cupcake… recipe coming soon

But then I remember the real reason behind this blog isn’t about the pictures. It’s primarily about storing all of my favorite recipes, old and new, in a place that is easily accessible by friends, family, and me! When thumbing through my old website, of course I cringe at the bad lighting and the hideous yellow bathroom tile and the complete and utter lack of cabinetry in that kitchen… but the snapshot in time of my little boys? Priceless.

Blueberry Muffins

(This recipe is a combo platter of Ina Garten, Smitten Kitchen, and yours truly. Despite the questionable photos, these were really tasty).

Ingredients:

  • 12 tablespoons (1 1/2 sticks or 170 grams) butter, at room temperature
  • 1 1/2 cups sugar
  • 3 extra-large eggs, at room temperature (you can hurry this along by placing them in a cup of warm water)
  • 1 1/2 teaspoons pure vanilla extract
  • Zest from 1 lemon
  • 1 cup buttermilk
  • 2 1/2 cups all-purpose flour
  • 2 teaspoons baking powder
  • 1/2 teaspoon baking soda
  • 1/2 teaspoon salt
  • 1 pint fresh blueberries, stems removed (I used a bag we had frozen from last summer)

Procedure:

  • Preheat the oven to 350 degrees. Line the muffin cups.
  • In the bowl of an electric mixer fitted witht he paddle attachment, cream the butter and sugar until light and fluffy, about 5 minutes. Add the eggs one at a time and beat until fluffy, another 1-2 minutes. Add the vanilla, lemon zest, and buttermilk.
  • Add the dry ingredients (flour, baking powder, baking soda, and salt). Mix until just combined (do not overmix).
  • Remove the paddle attachment and fold in the blueberries with a spatula.
  • Scoop the batter into the muffin pans, filling each cup just over the top, and bake for 23-25 minutes, until a toothpick inserted in the center cupcake comes out clean.

Enjoy for breakfast, or any time of day!

Tomato Soup

Going to the grocery store used to be one of my favorite things. I have friends who make fun of me because I had refused to get on the time-saving grocery pick-up bandwagon… but I really like looking at my own produce… and occasionally talking to my butcher! Plus, I live in a small town, so the grocery store is basically like social hour. I see neighbors and former students, friends of my parents and my favorite checkout clerks. Of course, my own kids complain that trips take much longer than they should because I “talk too much.”

Well, no more.

I haven’t been much since the stay-at-home order started — my husband usually volunteers, desparate to get out of the house. But today, it was me. And it was a little overwhelming and sad.

One of my former students was my cashier and he didn’t recognize me behind my mask (although he said he should have known from my voice — which I’m choosing to take as a compliment). People look stressed and sad, and the shelves are still missing random stuff (Red grapes? Why are there no red grapes?)

Still, we are counting our blessings and using some pantry staples to get us through.

My youngest LOVES tomato soup. It always makes his top five list and always brings a big old smile to his face. Usually, we just serve the grilled cheese on the side… but if you’re feeling fancy, this is also fantastic prepared like French Onion Soup — oven-proof bowl, a round of toasted bread, and a lid of shredded cheddar, run under the broiler? It’s as amazing as you’d think.

But sometimes, simple is OK, too.

This one is adapted from my favorite food blogger, Deb Perlman of the peerless Smitten Kitchen.

Ingredients:

  • Two 28 oz cans whole, peeled tomatoes (San Marzano, if you can get them, are the best)
  • 2 Tablespoons brown sugar
  • 4 Tablespoons butter
  • 1/2 onion, minced fine
  • 1 teaspoon red pepper flakes (optional)
  • 1 Tablespoon minced garlic
  • 2 Tablespoons tomato paste
  • 2 Tablespoons flour
  • 2 cups chicken stock
  • 1/2 cup heavy cream (or 3/4 cup half and half)
  • chopped fresh herbs, such as basil and oregano

Preparation:

  • Preheat the oven to 425.
  • Line a baking sheet with foil. Using a fork, remove the whole tomatoes from the 2 cans. Reserve the juice. Place the tomatoes in a single layer on the foil. Sprinkle the tomatoes evenly with brown sugar.
  • Bake until the tomatoes start to brown around the edges, usually about 30 minutes. Remove and let cool slightly while you prepare the other ingredients.
  • Place the butter in a large pot on the stove. Heat until melted and foaming, Add the onions and a bit of salt and cook for 6-8 minutes, until soft. Add red pepper flakes, garlic, and tomato paste. Cook for 2 minutes.
  • Add flour and stir vigorously to prevent sticking. Cook for about a minute.
  • Slowly add the chicken stock, whisking constantly to avoid lumps. Add the reserved tomato juice. Add the tomatoes and any accumulated pan juices from the baking sheet. Bring to a boil, then reduce to a simmer. Cook for about 10-15 minutes.
  • Use an immersion blender to puree the soup until it is smooth. (Alternately, you can leave it chunky or blend in a traditional blender, but allow the soup to cool, work with small batches, and vent the top of your blender if you’re going that route).
  • Stir in cream or half and half and minced herbs. Taste for salt and other seasonings. This will vary widely, depending on how salty your chicken stock was.
  • Serve with grilled cheese and enjoy the big smiles!

Hot Cheese Puffs

Happy Friday, y’all!

It has been a week! I’m still in the midst of grading my last big set of papers for my seniors. I’ve been grading 8-10 hours a day, without seeing students except on Zoom, and I’m tired.

But, it is Friday!

And these little hot cheese puffs are the perfect accompaniment to cocktail hour (even if your cocktail, like William, is a tall glass of milk).

My mom usually kept a Ziplog bag of these in the freezer and would pop a dozen in the oven when friends dropped in for a glass of wine on a Friday afternoon. One day soon, I hope this is our reality again.

I have such vivid memories of stamping out little circles of crustless white bread for my mom using a silver jigger with pink elephants on the sides. The jigger has been lost over the years, but my kids are still willing to put in a fair amount of labor because they love these. And Michael even made them a special “cutter” out of a (cleaned!) piece of PVC pipe.

They are adapted from “Hot Shrimp Puffs” in Celebrations on the Bayou. I cannot ever remember my mom adding shrimp to this recipe, but I’m sure it would be delicious.

Ingredients:

  • 8 oz cream cheese, softened but not liquefied
  • 2 tsp minced onion
  • 1/2 cup mayonnaise
  • 2 Tablespoons chopped chives
  • 1/2 tsp cayenne pepper
  • 1/4 cup freshly grated Parmesan cheese
  • 1 small loaf white bread

Procedure:

  • Mix the cream cheese, onion, mayonnaise, chives, pepper, and Parmesan in a mixing bowl until well combined. The mixture will be stiff.
  • Using a small, circular glass, cut white bread into circles (a shot glass works well). You can also cut the bread into squares, removing the crust.
  • Spread each circle with approximately 1/2 – 1 teaspoon of the cheese mixture. This will vary depending on the size of your circles.
  • Bake in a 350 oven for 10-12 minutes, until lightly browned and slightly puffed.
  • NOTE: extra puffs can be frozen on a cookie sheet before baking. Once frozen, you can pop them into a Ziploc bag and keep them in the freezer until the next time you need a delicious accompaniment to cocktail hour.

Enjoy!

Michael’s Instapot Chicken Tikka Masala

Last year, I started teaching a night class for a few weeks before each ACT. And I loved getting to interact with kids from all different schools and meet some great personalities along the way. My little “side hustle” became one of the best parts of the week.

Today, for the second time, I connected with one of my favorite pairs of kids via Zoom. They didn’t make fun of my celebratory dance when my technology worked perfectly. (In case you’re wondering, I successfully worked math problems on my shared iPad screen and I felt like Sal Khan for a minute there! It was seriously SO cool).

Deciding to expand my second job involved a lot of marital discussions. I’m usually the one at home getting supper ready and checking off on homework in the evenings. But we both knew working a few nights a week could provide a lot more opportunities for my family than we can make happen on two teacher salaries.

At first, my kids ate a lot of take out on nights when I worked. And honestly, I was usually as happy to see that Little Caesar’s box as anyone. No dishes, right??

But the BEST was when Michael mastered one of his favorite Indian take-out dishes. This is almost certainly NOT the most authentic recipe out there, but we love it. It seems like a lot of ingredients, but most of them are spices (and if you can’t find the garam masala, let me know… he ordered it in bulk and I can leave extra on my porch!). It comes together fairly quickly and my kids and I all love it when he pulls out the Instapot for this one!

Ingredients:

  • 2 Tablespoons butter
  • 1 onion, diced
  • 1 1/2 tsp salt
  • 1 Tablespoon minced garlic
  • 1 Tablespoon minced fresh ginger
  • 2 Tablespoons garam masala
  • 1 tsp ground chili powder
  • 2 tsp ground cumin
  • 1 tsp ground turmeric
  • 1/2 tsp ground cayenne
  • 2 lbs boneless, skinless chicken thighs, cut into small pieces
  • 1 can tomato sauce (get measurement)
  • 1 can coconut milk
  • 1/2 cup plain nonfat Greek yogurt
  • For serving: rice, chopped cilantro, naan

Procedure:

  • In a large pan on the stovetop or an Instant Pot turned on to the Saute setting, melt the butter. Add the onions and cook over medium to high heat until translucent (8-10 minutes). Add the spices and stir until fragrant.
  • Add the chicken and stir well to coat with spices. Cook for about 5-7 minutes.
  • Add the tomato sauce. If you are using the Instant pot, cover and cook on HIGH pressure for 8 minutes and vent OR (if you’re doing this on the stovetop, cover and simmer 45 minutes.
  • Uncover and stir in the coconut milk. Turn the Instant Pot back to saute (or turn the heat back to medium if you are doing this on the stove top) for 10-15 minutes.
  • Turn the heat off and let cool for 5-7 minutes. To avoid curdling the yogurt, remove a small portion of the sauce to a separate bowl. Stir the yogurt into this small portion, then add the warm mixture to the big bowl.
  • Serve over rice with naan.
the master chef!

Enjoy!

Crème Brûlée

You want to know what really drives my kids crazy?

Most of the “fancy” desserts I make leave the house. Grasshopper brownies for Christmas parties, cookies for my students, a cheesecake for a friend’s Thanksgiving. Sure, my kids get to taste. If I’m plating something, the edges I cut off are theirs, no questions asked. And frequently, the desserts are for events they attend, or for their schools, so they definitely get a piece.

But this month is the first time that almost 100% of the desserts have been strictly for them.

At first, their surprise was a little insulting.

The thirteen-year-old looking at a beautiful dessert sighs as only 13 can: “Who is that for?”

“You! It’s not like we are going somewhere!”

“Like we can eat all of it?” And then, to add to my guilt… “Even the pretty ones? We don’t have to find a messed up one?”

That may be the cooking lesson I take away from this — that it’s important sometimes to make something fancy for the people who live in this house — not because it’s a special occasion, but just because it’s a rainy Sunday afternoon.

Fast forward to today. It’s Monday morning and I am trying desperately to get a head start on the 88 Textual Analyses I have to grade this week. Each one takes about 10-15 minutes to give feedback on, and the math… I just can’t. So I put my science-teacher husband in charge of breakfast.

I walked into the kitchen to refresh my coffee and found him, propane torch in hand, caramelizing a crème brûlée for the kid who fell asleep before dessert last night.

It’s safe to say my kids are no longer dessert-deprived. I’d argue they’ve become downright spoiled. I’ve never had crème brûlée for breakfast.

Classic Crème Brûlée

Ingredients:

  • 1 whole egg
  • 4 egg yolks
  • 1/2 cup sugar, plus 1 tablespoon per creme brulee
  • 1 tablespoon vanilla extract
  • 3 cups heavy cream

Procedure:

  • Preheat your oven to 300 degrees.
  • In the bowl of a stand mixer with the paddle attachment, mix the egg, egg yolks, and 1/2 cup sugar until combined (about 1 minute). (You can also do this by hand with a whisk). Scrape down the sides of the bowl, add the vanilla extract, and mix one more time.
  • In a saucpan, scald the cream. Heat it until it is very hot, but not boiling. You can wait until you see tiny bubbles form around the side, or, if you’re my child, keep sticking your finger in until it almost burns you.
  • With the mixer on low, slowly add the hot cream. Begin with very small splashes of cream to “temper” the egg mixture and avoid scrambled eggs. Scrape down the sides well. You can also do this by hand, whisking the egg mixture while you slowly add the milk.
  • Pour the custard mixture into ramekins.
  • Place the ramekins on a baking sheet. Place the baking sheet in the preheated oven. Pour hot water into the baking pan until it rises half way up the side of the ramekins.
  • Bake for 30-35 minutes, until the custards are set (you can tell by jiggling the individual ramekins a bit. When they are done, they will still move a bit but not slosh).
  • Carefully remove the pan from the oven. Bring to room temperature before trying to get the ramekins out of the hot water. Refrigerate until ready to serve.
  • Top each ramekin with 1 tablespoon granulated sugar (or enough to completely cover the custard with a thin layer of sugar). Using a propane torch or crème brûlée torch, melt the sugar. It will melt, then bubble, then brown and spread over the surface. Let sit for 1-2 minutes, and a hard shell will form. Then you’re ready to serve! (You can also do this using the broiler on your oven. Position a rack very close to the burner and set the temperature to 500. Place each ramekin (no longer in the water bath) on the top shelf. Watch them very carefully! You will have less control than you would with a torch, but it will still work. )
  • Top with fresh fruit (we liked rasberries) and serve!

Notes: My youngest would like everyone to know that “crème brûlée” literally translates to burned cream, so a few dark brown spots are OK. Also, the ingredients here are really simple, so technique is everything! Go slowly and pay attention to the details! (I almost subbed milk in for the cream in this one, until he caught me. I don’t think the custardy texture would have been quite the same.)

Enjoy with the ones you love!

Smoky Venison Chili

Do your kids ever talk you into things that no one else can?

I grew up in a hunting family. but I’m the only one of my siblings who has never killed a deer. My dad always offered — I was just never that interested.

My husband, too, has offered, and while I’ve always been on board for fishing or boating, sitting in a deer stand all afternoon just never held much appeal.

But my oldest is really into hunting. And he’s in that adolescent stage where connecting is sometimes difficult.

So when he asked repeatedly that I go with him last fall, I finally said yes. Granted, I came armed only with my current novel. We stopped at a gas station and I bought our favorite junk food to share — Sour Patch Kids and Twix but no chips because “those are noisy!”

It was beautiful watching dusk approach out in the woods. We saw a few does, but nothing he wanted to shoot. He told hunting stories and we talked about what we were reading and school and sports and friends. There weren’t any grand epiphanies, but we both enjoyed each others’ company. And I’ll definitely go again next year.

Even though we didn’t see much that day, he did have a good enough season that we bought a new deep freezer last fall, and we have yet to experience a meat shortage.

This is his favorite venison recipe. It’s not my family’s traditional one (with hamburger and kideny beans). This is more complex, smokier, bean-free, and just the right balance if your reluctance to use venison has been its “gaminess.”

It’s adapted from The Southerner’s Cookbook by the editors of Garden and Gun.

Ingredients:

  • 3 Tablespoons vegetable oil
  • 3 Tablespoons butter
  • 3 lbs ground venison (or ground hamburger)
  • 2 medium/ small yellow onions diced (or 1 1/2 large)
  • 4 garlic cloves, minced
  • 1 Tablespoon chili powder
  • 2 teaspoons cumin
  • 12 oz dark beer
  • 2 (12 ounce) cans Ro-Tel tomatoes, drained (or 24 ounce can crushed tomatoes)
  • 2 cups beef stock
  • 2 tablespoons dark brown sugar
  • 3-5 chiles from a can of chiles in adobo sauce, chopped (NOTE — use 3-5 chile peppers, not 3-5 cans of chile peppers. These are spicy!)
  • 2 teaspoons dried oregano
  • sour cream, limes, cheese, cilantro, sliced jalapenos to garnish

Procedure:

  • Turn the stove to medium high and salt the ground meat. In a heavy skillet or pan (I use my Dutch oven), heat one tablespoon each of the oil and butter. Brown the meat well.
  • Remove the meat with a slotted spoon and palce on a plate lined with paper towels to drain.
  • Add the remaining oil and butter to the pan. Add the diced onion and saute for 8-10 minutes, until translucent and beginning to brown.
  • Add the garlic, chili powder, and cumin. Cook 2-3 minutes, stirring constantly. The spices will be aromatic.
  • Add the beer to deglaze the pan. Then add the tomatoes, beef stock, brown sugar, chopped peppers, and oregano.
  • Reduce the heat to low and simmer for approximately 2 hours, uncovered, stirring occasionally. Taste for salt and for seasonings.
  • Serve with optional garnishes.
  • This is even better the next day, and also freezes very well.

Enjoy with your favorite hunters while they dream of fall!

The Old Fashioned

Today was hard.

Today, I passed out caps and gowns to my seniors.

In a mask, socially distanced, with some of my best teacher-friends.

And not hugging every single kid was the hardest thing I’ve had to do in a long while (and I suspect I was not alone in this). Some of these kids show up to Zoom chat almost every day. Some I see when I walk through my neighborhood. Some I know will be life-long friends. But some, I haven’t seen since March 13, and I wonder if I’ll ever see them again.

The problem is — I LOVE my job. It took me a long time to decide what I wanted to be. Teaching isn’t something I just fell into; it was a hard-fought, conscious choice. And I love my kids.

And I’m used to working so hard to make graduation perfect for them. Every year, I work with valedictorians on speeches and comfort the ones who *just* missed it — because, in case you’ve forgotten, Calculus is hard, y’all.

I will never forget working graduation as a first year teacher positioning chairs on the field with a ruler so they’d be perfectly spaced — while a seasoned veteran bellowed instructions using a bullhorn from the stadium seats.

Or the year it rained right before the ceremony started and I dried all 200-some-odd chairs with old towels the football coaches found for me so that no kid would have to sit in a puddle. Or the year it rained DURING the ceremony…

I could go on, but watching the sun set over the stadium while 200 kids I love cross the stage is truly one of the best parts of teaching seniors.

Graduation is the longest day of the longest week of my teacher-life… and I would give A LOT to be able to make it happen this year — even in July.

But for today, I sat outside and enjoyed the sunshine. And rode bikes with my 10 year old. And made myself the Old Fashioned that my great aunt — one of the strongest, smartest women I know — taught me one Thanksgiving a long time ago.

And yes, I shed a few tears for the class of 2020. They will forever be in my heart, and I hope that this experience only makes them stronger, more empathetic, and even better equipped to make our world a brighter, healthier place.

Aunt Glenna’s Old Fashioned

Ingredients

  • 1 tablespoon simple syrup (see below)
  • 1 1/2 ounces good bourbon
  • 1-2 dashes Angostora bitters
  • 1 maraschino cherry (Luxardo preferred)
  • 1 piece orange rind

Procedure

  • Make the simple syrup. Bring 1 part sugar and 1 part water to a boil. Allow to cool to room temperature. *Usually, I prepare a cup at a time. This keeps well in the fridge in a mason jar, but on more than one occasion, I’ve had a friend ask if it was moonshine. So labeling may be key.
  • Pour 1 one scant tablespoon of simple syrup into an old-fashioned glass. Add the bourbon and bitters and stir. (“Not too sweet!” — Aunt Glenna).
  • Add ice.
  • Garnish with the cherry and a piece of orange peel (not a whole slice, because, in the words of a my aunt, “It’s a cocktail. Not a fruit salad.”)

Cheers!

Mexi Coleslaw

So what’s the craziest thing that’s happened during a Zoom meeting for you? Mine have been fairly tame so far. I mean, other than that news guy showing up the week we started all of this.

In general, I’ve managed to mute out background noise (using my son’s Fortnite headset). I’ve been, if not “professionally dressed,” at least decent (I get cold a lot, so apparently I’m always in the same sweatshirt). I don’t have any babies who cry or drive a firetruck across the keyboard. Yes, occasionally the ten-year-old pops up with a chicken, but my students become more engaged during that part of the lesson than any other.

But one time? The thirteen-year-old walked in with a cabbage. This was unusual on a variety of levels. First, he is the most easily embarrassed member of the family. 7th grade is hard, y’all. But a sweet neighbor apparently bought a bunch from a grower who used to mostly sell to restaurants, and dropped one off for us. So he walked into the screen on a virtual department head meeting with a big, green cabbage.

The point of this story? I’m not even sure. But we did make some really good coleslaw.

This is our favorite variation on “Bright Cabbage Slaw” from Samin Nosrat’s Salt, Fat, Acid, Heat… which is a wonderful read (and not a bad Netflix show, either).

Ingredients:

  • 1/2 head green cabbage, cored and chopped
  • 1/2 small onion, sliced very thin (red, if you have it… I didn’t)
  • 1 jalapeno, seeded and chopped
  • Juice of 1 lime
  • 1/2 cup chopped cilantro
  • 3-4 tablespoons extra-virgin olive oil

Procedure:

  • Core and chop the cabbage. Place in a colander and toss with two generous pinches of salt. Let sit for about 20-25 minutes to drain (ours didn’t produce very much liquid, but that’s ok)
  • Place the onion, jalapeno, lime juice, and another pinch of salt in the bowl you will use to serve the slaw. Allow the onion mixture to macerate for about 20 minutes (this will remove the sharp bite).
  • After 20 minutes, add the cabbage to the bowl with the onion and jalapeno. Add the cilantro and olive oil and toss well to coat.
  • Taste for seasonings (you may need a pinch or two more of salt). This is best if you give the flavors another 30 minutes to mingle, and you can make it up to a day ahead. Serve cold or at room temperature.

Enjoy!

Pavlovas

I thought I wasn’t a stress buyer. I didn’t order N-95 masks on Amazon or stock up on an unnecessary amount of toilet paper. But when we couldn’t find any eggs in any grocery stores for a week, I did let my husband talk me into baby chicks. And then my friend sent me a New York Times article and apparently, I am part of a national trend. A baby chick trend. Insert self-deprecating eye roll.

Also, we did finally find some eggs. Sort of an embarassingly lot of eggs. And Easter is coming! So I made one of my favorite egg-heavy recipes — miniature berry pavlovas.

Ingredients:

  • 5 egg whites at room temperature (note: eggs separate more easily when cold, but whip more easily at room temperature, so separate your eggs first and then wait a bit to whip them)
  • 1/2 teaspoon cream of tartar
  • 1 cup sugar
  • 1 cup whipping cream, beaten with 1/3 cup sugar
  • 1 cup assorted berries, for serving

Procedure:

  • Whip the egg whites and cream of tartar until they begin to be opaque with large bubbles. Slowly add the sugar, pouring in a slow but steady stream. Continue beating until soft peaks form (but do not overbeat — these should not be dry). When you drag a spoon through the beaten egg whites, the line should mostly stay visible.
  • Preheat your oven to 275.
  • Line 2-3 baking sheets with parchment paper. Spoon or pipe heaping tablespoons of the meringue onto the baking sheet. These spread some, but not tremendously, so leave some space between each one. You can flatten them slightly in the middle to create more of a “nest.”
  • Bake for 30-40 minutes until lightly browned and dry.
  • While the meringues bake, whip the cream and wash and cut your berries.
  • Top the cooled meringues with whipped cream and berries (or chocolate mousse and whipped cream and berries, if you’re William)
  • Meringues can be stored for up to 3 days in a ziploc bag, but unless your climate is drier than mine, you will probably need to re-crisp them before serving. To do this, preheat your oven to 300 degrees and let them bake for 5-7 minutes.

Variations:

You can make one giant pavlova using a pie shell or just spreading or piping the meringue into a single big puff on a baking sheet. Then pile the whipped cream and berries in the middle.

To make the delightfully named Eton Mess, crumble the meringues and layer them with the whipped cream and berries in a pretty glass.