Venison Roast

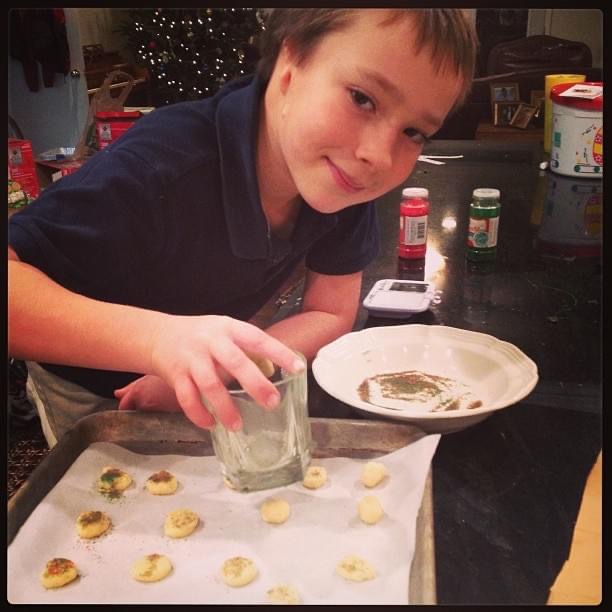
People say that kids change you, but at the beginning of this adventure, I thought I’d be the one that primarily did the molding. Instead, they have changed quite a few of my likes and dislikes over the years. I never knew how much I’d love soccer, until my kids loved it first. I look at TikTok videos more than I ever thought I would. I read more sci-fi and fantasy, and watch a LOT more sports movies.

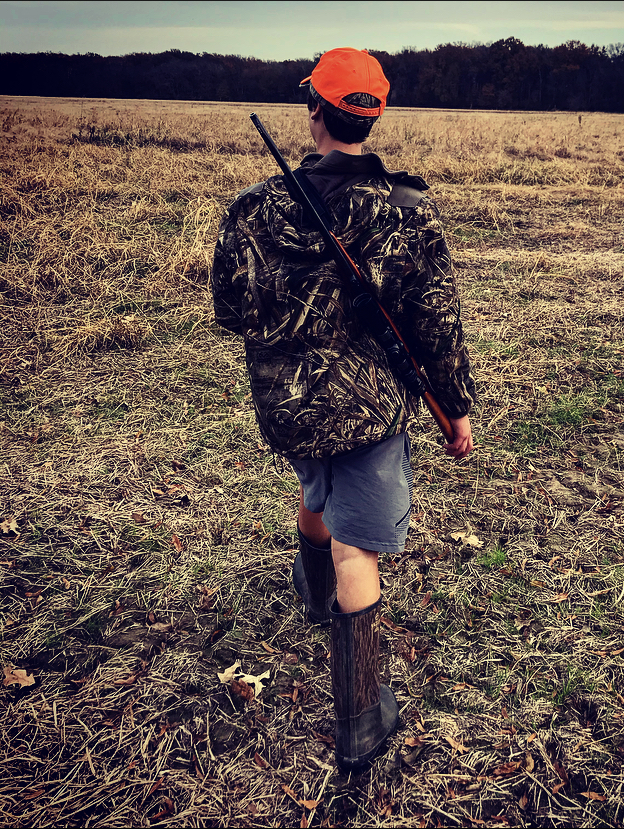
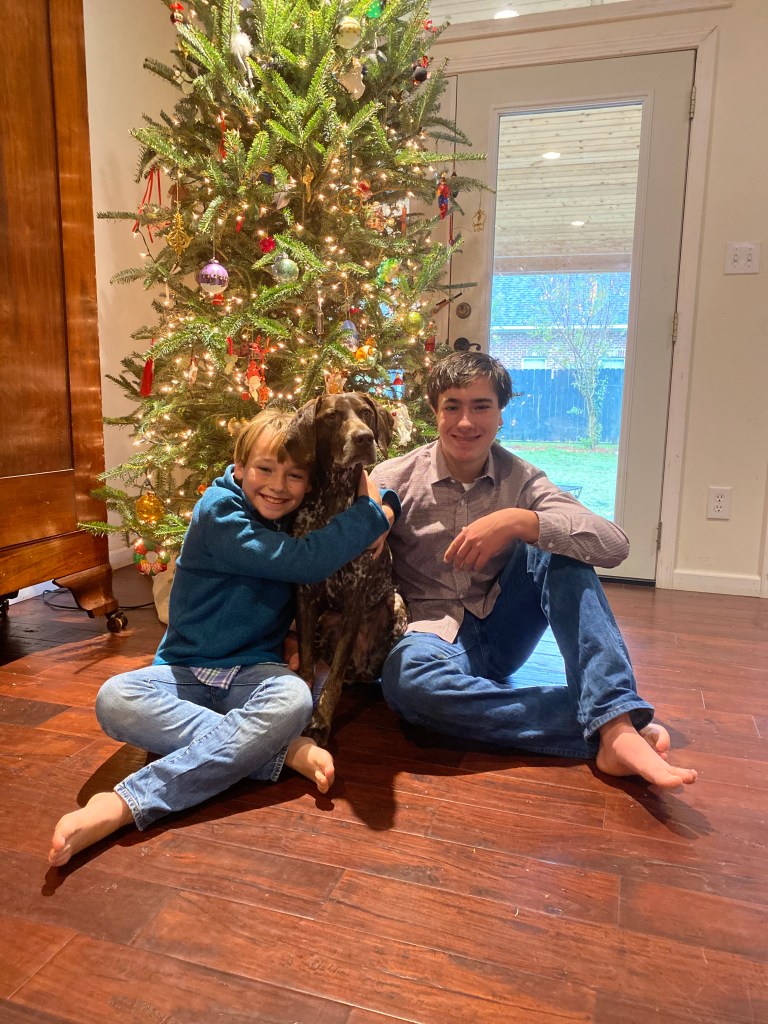
But my oldest kid’s longest and most enduring passion has always been hunting. And to be honest… I have struggled to get behind a freezer absoutely FULL of venison.

He never turns down an opportunity. He goes when it is hot or cold, early in the morning or all afternoon, every day he can. Deer or duck. Shotgun, rifle, or (his favorite) bow hunting from a tree stand. Yesterday, he chose the last day of gun season over the Saints game. (His hunt went better than the game). And since he’s a pretty decent shot, we end up with a LOT of venison.

And other than deer tacos and venison chili, there wasn’t much that didn’t taste “gamey.” But then, my brother recommended a John Besh recipe for a bone-in should roast, and y’all. It’s good. Like really, really good.

Ingredients:

  • 4 Tablespoons bacon drippings OR 2 Tablespoons each, butter and olive oil
  • 1 3-4 pound bone-in venison shoulder (can also use a chuck roast or other beef roast)
  • 2 medium onions, diced small
  • 1 carrot, peeled and diced
  • 1 stalk celery, diced
  • 1 Tablespoon chopped garlic
  • 6 oz. tomato paste
  • 1/4 cup flour
  • 4 cups beef broth
  • 1 cup red wine
  • 1 Tablespoon Worcestershire
  • 1 tsp dried thyme
  • 1 sprig fresh rosemary
  • 2 bay leaves

Method:

  • Preheat your oven to 275.
  • Salt the venison generously on all sides. Make sure it’s completely thawed.
  • On the stove top in a Dutch oven or other heavy, oven-safe pot, heat the bacon drippings (or butter/ olive oil combo) until hot but not smoking (test using a drop of water — it should sizzle).
  • Brown the venison on all sides, approximately 2-3 minutes per side. Remove and set aside.
  • Reduce the heat. Add onions, celery, and carrots and cook, stirring frequently, until they turn a “rich mahogany color.”
  • Add the garlic and tomato paste, stir well, and cook another 2-3 minutes.
  • Add the flour, stir well, and cook another 2-3 minutes.
  • Slowly add the beef broth, a little at a time, and whisk to combine to avoid lumps.
  • Add the red wine and Worchestershire and bring to a boil.
  • Add the thyme, rosemary, bay leaves, and venison.
  • Cover tightly and place in the oven. Bake for one hour per pound of meat (approximately). This roast was a little over 3 pounds and I cooked it for about 3 1/2 hours.
  • Remove from the oven and test with a fork. The meat should easily pull away from the bone. If it does not, put it back in the oven for 20-30 minutes and try again.
  • When the roast is done, remove it to a cutting board and shred the meat using two forks. Then place it back in the pot to warm.
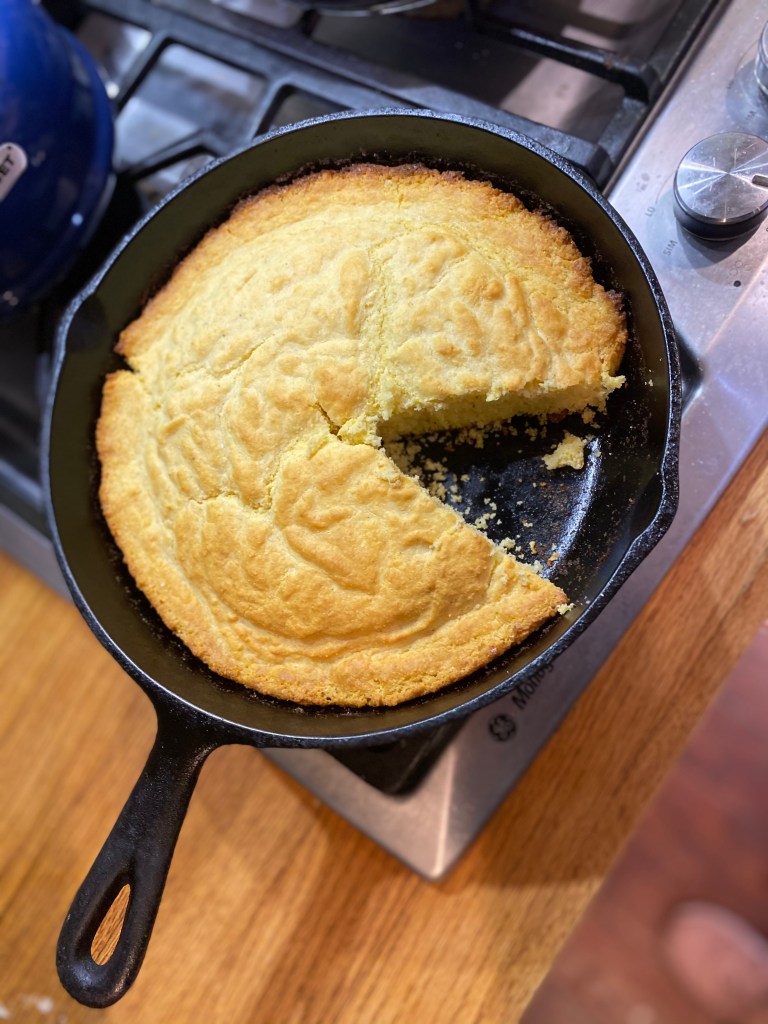
  • Serve over mashed potatoes, rice, egg noodles, or grits.
  • Enjoy with your favorite hunter!

King Cake

Today, it snowed in Louisiana!

For the uninitiated, this means

  • School is cancelled because we know we don’t have the equipment or skills to drive safely
  • Kids everywhere dress in repurposed camo hunting clothes (the only cold weather waterproof things my kids own)
  • We slide down levees (because they are easily the biggest hills in town)
  • Some use crawfish trays and garbage can lids… but my kids have always had a sled because my father-in-law used to travel to Wisconsin for work, so my husband always grew up with a real sled, and yes, it’s worth the storage space for the once in every five years we use it
  • I make king cake, because it’s also Carnival season… and “they can’t cancel King Cake!”

This recipe is a re-post from my original food blog back on blogspot years ago. The original came from Celebrations on the Bayou, but I’ve made quite a few tweaks over the years!

For the dough:

Ingredients:

  • 1 stick melted (but not too hot) butter, plus 2 Tablespoons softened, for the bowl
  • EITHER 2/3 cup evaporated milk and 2/3 cup water OR 1 1/3 cups milk, heated to about 100 degrees (should feel warm to the touch)
  • 1/2 cup sugar
  • 2 tsp salt* (or 1 1/2 tsp — see note)
  • 5 teaspoons yeast (2 envelopes)
  • 4 eggs
  • 6 cups all purpose flour

Combine the butter, milk (and water), sugar, salt, and yeast in the bowl of a stand mixer with the paddle attachment. Let sit for 2-3 minutes, until frothy.  Beat in eggs one at a time.  Add flour and beat until just combined. Turn out into a buttered bowl.  Cover with a damp towel or plastic wrap and allow to rise for 1 1/2 to 2 hours in a warm place. Meanwhile, make the filling (see below). The dough will be very sticky and won’t rise as much as bread dough.

After it has risen, generously flour your counter. Dump the dough onto the counter and roll it into a long, thin rectangle. Divide the dough into three long strips.

For the filling:

  • 1 block cream cheese, very soft (I microwave these on half power)
  • 1/2 stick butter, very soft but not liquid
  • 2/3 cup white sugar
  • 1/3 cup brown sugar (dark or light)
  • 1 Tablespoon cinnamon

Preheat your oven to 350. Combine the butter and cream cheese.  Spread (or dollop) the mixture down the center of each strip. Sprinkle sugar, brown sugar, and cinnamon down the center of each strip on top of the cream cheese and butter mixture. Fold lengthwise, pinching the edges together to seal so that the cinnamon filling is in the middle of each strip.

Lifting each section over the others, carefully braid the sections of bread. It works best if you start in the middle and then braid outwards from each side (method #2 in this video).

Gently lift the middle section of the braid and place it on a flat baking pan or a stone lined with parchment paper** Shape it into a circle and tuck in the ends.

Let it rise, uncovered, for 20-30 minutes.  Again, it won’t quite double.  Bake in a 350 oven for 20-25 minutes, until golden brown. Meanwhile, prepare the icing. (Note that the one pictured above was slightly overbaked because I got distracted playing in the snow!)

For the icing:

  • 4 Tablespoons butter, melted
  • 1 1/2 cups powdered sugar
  • 1 teaspoon vanilla extract
  • 1 – 2 Tablespoons milk (as needed, for consistency — you want it to be easily spreadable, but not quite pourable)
  • Colored sugar — purple, green, and gold***

Allow the cake to cool only slightly. Move it to your serving platter before icing, if desired. Spread the glaze over the cake while it is still slightly warm, then sprinkle it with the colored sugars.  The icing sets up fairly quickly, and when it does this, the colored sugar doesn’t stick as well, so I usually do one section at a time.  Sprinkle with alternating colors – purple, green, and gold. I do two of each color for a total of six. Kids love helping with this part.

And don’t forget to tuck a baby inside! You can buy them online or save ones that you find in a king cake.  Elementary school teachers are a great source 😉 The finder gets to make (or buy, for the faint at heart) the next king cake.

Enjoy with your snowy kids (knowing full well they may be back to shorts and sandals next week)!

Notes:

* I use Diamond Kosher salt, which is made differently and is less salty than traditional table salt or other Kosher salt. If you are using regular salt, 1 1/2 teaspoons is better.

**Parchment paper is not necessary if you are going to serve the cake on the pan you bake it on… however, it does help with cleanup and is essential if you are putting the cake on a different serving platter.

*** I buy my colored sugar at Michael’s or the baking section of Walmart, or I order from King Arthur online. You can also use food coloring and a plastic bag to dye sugar. I like coarse sugar best for this, but any kind will work. An alternative is to separate the icing into three bowls and use food coloring to dye it.

Basic Cornbread

Happy New Year!

Tomorrow, I go back to school. (Lesson plans? What lesson plans? I think I’ll write a blog post instead). I’ve read lots of books and cleaned out my pantry and closet, so I guess I’m as ready for a new semester as I ever am.

Everyone — my family included — is ready to put 2020 in the rearview mirror. Yet this year has brought my family closer, both those I live with and my siblings who live far away. I miss my mom terribly, but she should get the vaccine on January 12, so maybe there is a light at the end of that tunnel, too.

The traditional New Year’s foods — Hoppin’ John, greens (or cabbage, for my husband’s family), pork, and cornbread are supposed to bring luck and prosperity. This year, I again made my favorite Bacon Jam and Greens from The Southerner’s Cookbook… and it was just as amazing as I remembered.

But then I realized that cornbread — which unlike the greens and hoppin’ John is a year-round favorite here — definitely deserved its own post. Plus, putting it here makes it easier to find the recipe when I’m making red beans and rice, chili, or any of our other favorite cornbread-requiring mains.

Southern cornbread is decidedly NOT sweet — which seems to defy normal North/ South logic. Take tea, for example. We like ours tooth-achingly sweet. But cornbread? Not that I will turn my nose up at a pan of Jiffy, but if I’m doing the cooking? Save the sugar for the desserts. There are whole raging debates about this on the internet (the things you learn when you assign food research projects to your students). But as for my house… our cornbread is buttery, salty, tender… and not sweet at all.

Ingredients:

  • 1 cup yellow cornmeal*
  • 1 cup flour **
  • 1 heaping Tablespoon baking powder (or 3 teaspoons) 
  • 1 cup milk
  • 1 egg
  • 1 tsp salt
  • 4 Tablespoons butter

Method:

  • Preheat the oven to 450. Place a black iron skillet in the oven and let it get hot as the oven warms.
  • In a separate bowl, mix all of the ingredients except the butter.
  • Once the oven reaches 450, remove the skillet. Place the butter in the hot skillet and place the skillet back in the oven until the butter melts and foams. (You can also do this on the stovetop).
  • Remove the skillet from the oven. Pour half of the hot butter into the cornbread batter and stir. Then pour the cornbread batter into the hot skillet.
  • Place the cornbread back into the oven for about 15 minutes, or until the edges are browned and a toothpick or knife inserted in the center comes out clean.

Notes:

  • *Stone-ground cornbread is great, but for everyday around here, we use any basic yellow cornmeal
  • ** Going gluten free? Just replace the flour with a second cup of cornmeal. It will be considerably more crumbly, but also delicious
  • *** You can also use buttermilk for a little more tang, but again, for my basic everyday cornbread, we just use regular milk — whatever is in the fridge.

Enjoy, on New Year’s Day and throughout the year!

Itty Bitty Sugar Cookies

My recipe for these reads “Sugar Cookies by Mern,” but my kids have always called them “the itty bitty sugar cookies.” Mern was the grandmother of one of my best friends growing up, and in my mind, she remains the quintessential Southern belle — gracious and lovely. My only regret is that I have the recipe only in a bland, typed format… not the beautiful, tiny handwriting I remember from my mom’s recipe cards.

These sugar cookies are also one of my favorite Christmas gifts for teachers. The cookies are so tiny and crisp — they melt on your tongue. We make them by the dozens, sprinkle them with red and green sugar, and send them on their way just when teachers are feeling their most stressed.

This year, my youngest son has one of my former students as his English teacher, and it warms my heart in the most small-town of ways. But the fact that she had a thank you note in his hand before car pick-up the day we brought the cookies? Well, the student has certainly surpassed the teacher.

Ingredients:

  • 1 cup (8 oz or 2 sticks) butter at room temperature
  • 1 cup sugar
  • 1 egg (at room temperature)
  • 2 teaspoons vanilla extract
  • 2 cups all-purpose flour
  • 1/2 teaspoon baking soda
  • 1/2 teaspoon cream of tartar

Method:

  • In the bowl of a mixer with a paddle attachment, cream the butter and sugar until smooth and light (about 3 minutes).
  • Add eggs and vanilla. Beat until light (about 3 minutes)
  • Sift together flour, soda, and cream of tartar. Blend into butter mixture until just combined (do not overmix).
  • Chill until firm enough to work with the dough*
  • Form into small balls (about the size of a nickel in diameter) and place far apart on a cookie sheet lined with parchment paper.
  • Dip the bottom of a small glass* into sugar and use it to flatten the dough into thin, round cookies. Dip the glass into the sugar before flattening each cookie* We use red and green sugar at Christmas, but plain white sugar also works!
  • Bake at 375 degrees for 6-8 minutes, until the cookies are lightly browned on the outside.
  • Remove from the cookie sheet while hot and allow the cookies to cool on brown paper.
  • Makes about 10 dozen cookies.

Notes:

  • Mern said to chill the dough for 30 minutes. This has never worked for me! Maybe she was using her freezer. It takes about 2 hours, or overnight, in the refrigerator.
  • We use a shot glass for this — it’s the perfect size. But any flat-bottomed glass will do.
  • My chief helper highly recommends spreading a little dough across the bottom of the shot glass to make sure that the sugar adheres. We tried water, but not enough of the sugar stuck, so we liked the dough better.

Enjoy!

My oldest… way back in the day. I’m not even sure he is going to help me make these for his teachers this year… But middle school teachers probably deserve them the most!

Pound Cake

I love Christmas cards. I love getting them in the mail, and I love taking them of my kids each year. I frame the old ones, and when I pull them out of the attic each year, they always make me smile.

I also love that as my kids grow, the photo-taking process is so much quicker. Of course, there are far fewer funny outtakes. I mean, yes, we probably have one of the dog licking one of the kids in the mouth. But lets be honest, she does that pretty much any time one of them lets his face get within licking range.

Here, my husband is pretending there is a squirrel behind me. Lily is ready to pounce.

And so today, because pictures took less than ten minutes, when the big kid wanted to make poundcake, I put off grading papers one more time and played sous chef while he made his favorite pound cake.

This is adapted from Ina Garten, but also has twinges of my grandmother. It is simple and so very delicious.

Ingredients:

  • Baker’s Joy, Pam with Flour, or other nonstick spray
  • 2 Tablespoons raw sugar (also sold as turbinado sugar)
  • 1/2 pound (2 sticks) butter, at room temperature
  • 2 1/2 cups granulated sugar
  • 6 eggs, at room temperature
  • 2 teaspoons vanilla extract
  • Zest of 2 lemons
  • 1 teaspoon salt
  • 3 cups sifted all-purpose flour*
  • 1 cup heavy cream*

Method:

  • Spray a large tube or bundt pan (or 2 loaf pans) with the cooking spray. Put the raw sugar in the pan and shake to coat.
  • In the bowl of a mixer with the paddle attachment, cream the butter and sugar. Beat until fluffy (about 5 minutes).
  • Add the eggs one at a time, beating after each addition.
  • Add the salt, vanilla, and lemon zest. Beat well to combine.
  • Alternately add the flour and the milk, beating to combine and scraping down the sides, ending with the flour. Do not overmix.
  • Pour into the sugared cake pan.
  • Bake at 350 for approximately 40 minutes, or until a cake tester comes out clean.

Notes:

  • Room temperature butter and eggs are essential to avoiding lumpy batter. I generally leave the butter on the counter overnight, but even an hour out of the refrigerator is generally enough. To bring your eggs to room temperature, you can put them in a cup of warm water for 5-10 minutes before you crack them.
  • I am picky about my cake flour. I love White Lily All Purpose for cakes and cookies. It is made from a different type of wheat that is slightly lower in gluten, so it makes for a softer crumb. You can also buy actual cake flour (which is what the original recipe calls for) but I have better luck with White Lily for cakes.
  • Not wanting to use heavy cream? Half and half or whole milk will both work well here.

Enjoy!

(Oh, and here is what is probably my favorite Christmas card outtake over the years… my poor children and the torture they endure! At least they didn’t have to wear anything smocked this year!)

Apple Cider Caramels

I’m the first to admit that I’m difficult to shop for when it comes to kitchen stuff. I kinda hate gadgets (I know, baking blasphemy). But here’s the thing. I’d rather have my cabinets and drawers where I can easily get to everything I need. And when I load up on kitchen gadgets, I have to dig past the 4 specialty tools I only use twice a year to get to the ones I use every week.

However, I do have some exceptions. And one of those is a candy thermometer. Yes, I use it at most twice a year (and sometimes not even that often). Most candy recipes give these little side notes about how you can test the candy stages by dropping bits of boiling sugar into cold water and then testing the firmness of the ball. I cringe.

But I’m always just one step away from not making candy. It’s kind of a mess. You can spend all afternoon doing it and still have to answer “what’s for dinner.” So having the extra step of dropping spoonfuls of hot caramel from the stove into waiting cups of water? Yep, that would be enough to move candy-making from the “rarely” to the “never” pile or recipes.

Enter: the candy thermometer. (Also helpful — the easy-going kid who helped me make these just informed me he didn’t want lunch because he was full of caramel… ah, the blessings of being the second child. I didn’t even worry about it).

And these were the perfect baking project for last night/ this morning. They are delicious, perfect for holiday gifting, and exactly the sort of thing I want to do on my first Monday off of school. They would make amazing teacher gifts. And while kids can’t do much with boiling sugar and sharp knives, they can wrap them up, which is by far the most tedious part of all of this.

Adapted from Smitten Kitchen… see the original recipe (and Deb’s far superior photographs) here.

Ingredients:

  • 8 cups unfiltered apple cider (see note)
  • 1 tsp ground cinnamon
  • 3 tsp kosher salt (see note)
  • 2 sticks (16 tablespoons) unsalted butter, cut into chunks
  • 2 cups white sugar
  • 1 cup brown sugar
  • 2/3 cup heavy whipping cream
  • 1 Tablespoon vegetable oil

Method:

  • Pour the cider into a saucepan and boil over medium high heat until it reduces by 75%. This usually takes over an hour. You don’t have to watch it much at the beginning, but stand close once it has been reduced by half. You want it to turn dark (but not burn) and the consistency should be close to a thin syrup, not a juice. This is the longest part of the process.
  • Mix the cinnamon and salt in a small bowl and set aside.
  • When the cider has reduced to a syrup, take it off the heat and add, all at once, the butter and the sugars. Stir well to combine. Then add the whipping cream.
  • Return to the stove and bring this mixture to a boil. Using a candy thermometer, heat it to 255 degrees Fahrenheit, or the “firm ball” stage on my thermometer. This takes about 15 minutes. Watch it carefully! If it boils over, you’ll have a huge mess on your hands (ask me how I know).
  • Line a 9 x 13 pan with parchment paper.
  • Pour the liquid caramel into the pan and let it set up overnight. You can also do this in the refrigerator, and it will be ready to cut in about 2 hours.
  • Using the parchment paper, remove the candy to a cutting board.
  • Pour 1 Tablespoon vegetable oil onto a plate with a diameter that is a little longer than your knife. Place the blade of the knife into the oil and rock it slightly. Use the oiled knife to cut the caramel, repeating as necessary.
  • Cut the rectangle into long strips. Then cut each strip into squares. I like my caramels to be about 1 – 1 1/2 inch squares.
  • Meanwhile, have your favorite kitchen helper cut waxed paper, parchment paper, or freezer paper into approximately 5 inch squares. Place one caramel in the middle of each square and twirl the ends.
  • Share with your family and friends!

Notes:

  • Cider is the seasonal stuff sold in my grocery store next to the actual apples — not the apple juice that’s sold on the juice aisle. You want something that has been pressed this year and not pasteurized. This is not, however, the alcoholic “hard cider” either.
  • I’m a bit of a salt snob. I order Diamond Kosher salt online because nowhere in town stocks it, and I like it better. You can also use Norton Kosher salt — it’s slightly more “salty” — Diamond is milder — so dial back the amount listed above by about 1/4. Want an internet dive on the differences? Check out this, this, or this.
  • Only have salted butter? No worries — just dial back a little on the salt.
  • This is definitely “project” baking! We like to do these while watching Christmas movies or decorating the tree. Cutting the caramels and wrapping them can get tedious, so definitely break it up or invite your family to help!

Enjoy and Happy Thanksgiving!

Piecrust Cookies (“Pets de sœurs”)

One of my favorite parts about Thanksgiving break is curling up with the stack of books I’ve wanted to read for months, but have been to busy for. However, I’m not usually much of a mystery fan… until I discovered Louise Penny a few years ago. Her mysteries, which are set in Quebec, are so… cozy. Not a description usually associated with murder investigations, but I love these characters. And even the grim murders don’t haunt me for days.

But the descriptions of the food? Those stick with me.

Prior to Penny, I knew very little about Quebec, although my beloved next-door-neighbor in childhood was from the area. I find myself googling references to food, from poutine to pain doré.

And recently, she made a reference to a sweet called “pets de sœurs.” One short trip down an internet rabbit hole later, I found pictures of a treat from childhood I’d almost forgotten — what my grandmother called piecrust cookies. However, upon finding that the Quebecois translation is “nun farts” — well, let’s just say my boys have a new favorite cookie.

These are perfect for Thanksgiving when I always seem to buy too many piecrusts. The measurements are far from exact and can be adapted infinitely. My grandmother never devoted a whole pie crust to these, but instead would make just a few with the leftover scraps of crust. Here, I’ve included the recipe for a using a whole crust, but feel free to adjust as needed. These also serve the same function as hush puppies — giving my kids something to snack on while they wait (seemingly forever) for the real meal. A bonus? They make your kitchen smell delicious!

Ingredients:

  • 1 nine inch piecrust
  • 4 Tablespoons butter, softened
  • 1/4 cup white or brown sugar
  • 2 teaspoons cinnamon
  • 1/2 tsp nutmeg
  • 1/2 tsp ginger
  • 1 Tablespoon real maple syrup (optional — see note)
  • 1 egg for egg wash (optional, but makes the cookies brown and glossy)

Method:

  • Roll piecrust roughly into a rectangular shape, about the size of a piece of notebook paper.
  • Spread the softened butter all over the crust
  • Sprinkle with spices and sugar
  • Drizzle with maple syrup, if using
  • Starting on one of the long sides of your rectangle, roll the dough tightly to form a log. The log should be relatively long and skinny instead of short and fat.
  • Using a sharp knife, cut to form spiral cookies that are about 1/4 inch in length. Make sure your cookies are all roughly the same size. Otherwise, they won’t cook evenly, and some will burn while others are still doughy.
  • Arrange on a cookie sheet lined with parchment paper. These don’t spread much at all, so you can place them close.
  • Brush lightly with egg wash, if desired. You won’t use very much of the egg wash, but it does give them a brown, glossy color
  • Bake at 400 for 9-10 minutes, until cookies are brown

Notes:

  • I’ve only ever made this with store-bought pie crust. My favorite is Pillsbury, but other brands work — you’ll just need to get the kind that is not already pressed into a foil pan.
  • I’ve only ever done this with real maple syrup — I’ve never tried it with “pancake syrup” but I think it would be a mess and the flavor would not be as good. If I don’t have real maple syrup, I omit this step.
  • You can adjust with other fall spices. I also think you could add finely chopped pecans, walnuts, or apples.
  • If you don’t have parchment paper, (a) I recommend it highly for baking, and (b) you should definitely use aluminum foil or a silicone baking mat to aid with cleanup.

Enjoy!

Mayonnaise

Today marked the official end to a very long summer.

I miss my favorite tomatoes, too… Cherokee purples!

I spent the day fluctuating between normal back-to-school excitement and stress, trying to get my room pulled together and hammering out my syllabus… and then swinging into sadness because my kidsmy roommy year

One of the first things I completed was a survey from our new principal asking how many years we had been in the classroom. Y’all… this will be my 17th. My education career is as old as my students. I was a bit staggered.

I thought of memes I’d seen saying “This is every teacher’s first year!” And in some ways, this year does feel new and different and scary — much like a first classroom.

But the primary lesson of those seventeen years is what I hope to teach my students each year: We can do hard things.

My very first year, I was teaching when planes crashed into the twin towers. I took 3 years off to go to law school, so my second year teaching was 2005… and I was teaching in New Orleans. All my cute classroom decor that year was rendered a bit soggy by Katrina. Later that fall, I started over again in another classroom in Monroe, wearing clothes I had borrowed from my sisters because my clothes were still in New Orleans.

In short, my first two years teaching taught me that I could not control my circumstances. I could, however, control my attitude — and that affected my students’ engagement and outlook more than anything else.

Today also marked my move from one of my favorite summer lunches (BLT with homemade mayonaise) to my school year lunch (re-heated leftovers from last night). (Thank goodness there were still muffins in the teacher workroom to supplement).

Homemade mayonaise always makes me wonder if it’s worth it, but it is invariably easier to make and tastes better than I remember. I’ve tried and failed at more than a few variations… I know from experience that there are lots of YouTube tutorials on how to fix it when you mess it up. Some of them even work.

But my go-to recipe has never once failed me. It’s from Celebrations on the Bayou. It is slightly tangy but not at all sweet. It will elevate your chicken salad, cole slaw, or any other mayonnaise-based dish. But where it shines the most? The simple tomato sandwich.

Ingredients:

  • 1 egg
  • 1 Tablespoon olive oil
  • 1 tsp Dijon mustard
  • 1 tsp salt
  • 1 tsp lemon juice
  • 1 tsp white wine vinegar
  • 1 cup vegetable oil
  • 1/4 tsp cayenne pepper

Process:

  • Place the first six ingredients in the bowl of a food processor fitted with a steel blade. Mix until combined.
  • Slowly drizzle the vegetable oil through the feed tube. The mayonaise will become thick.
  • Stir in cayenne and store for up to 2 weeks in the fridge.
Back when the garden was growing lots of different lettuces… before everything burned to a crisp in the August heat

Blueberry Crumb Bars

Summer is my absolute favorite time to cook. Sure, fall and winter have cozy comfort foods, but when it comes to my favorite things to cook and eat, summer produce wins, hands-down. In fact, my family has long made fun of me for the Fourth of July being my favorite food holiday… not Thanksgiving. So this morning, we went to pick blueberries at a local blueberry farm. Sometimes, the desserts taste sweeter when you pick the fruit.

These blueberry bars are currently my oldest kid’s “favorite thing you make” — and he will eat the entire pan if I let him.

The berry picking crew!

Blueberry Crumb Bars (barely adapted from Smitten Kitchen)

Ingredients:

Crust:

  • 1 cup sugar
  • 1 tsp baking powder
  • 3 cups all-purpose flour
  • 1/4 tsp salt
  • Zest of one lemon (zest first, then save the juice for the filling)
  • 1 cup cold butter, diced
  • 1 egg

Filling:

  • 4 cups fresh blueberries
  • Juice of 1 lemon
  • 1/2 cup granulated sugar
  • 4 teaspoons cornstarch

Procedure:

  • In a large bowl or 8 cup measuring cup, place the blueberries, lemon juice, sugar, and cornstarch. Stir gently to combine, and allow to rest while you make the crumbs.
  • In a separate bowl, mix the dry ingredients (sugar, flour, baking powder, and salt). Add the diced butter and mix with either 2 forks or a pastry blender (if you don’t have one, it’s small, inexpensive, and multipurpose). Add the egg and blend until the crumbs are about the size of green peas.
  • Pour half of the crumbs into a greased 9×13 pan. Press the crumbs down gently.
  • Pour the berry mixture on top.
  • Sprinkle the rest of the crumbs loosely over the top of the berries.
  • Bake at 375 for 45-50 minutes, until the crumbs are golden brown.
  • Allow this to cool to room temperature before cutting. These keep well at room temperature or in the fridge. Enjoy!
Throwing it back 3 years!

Kale Quinoa Salad

My husband has a very green thumb. I, on the other hand, kill every plant I try to raise.

I do OK with kids and animals — we have two thriving boys, plus two dogs, four cats, and the chickens… but anything that doesn’t remind me to feed/ water it by making noise is probably condemned to die quietly in a corner.

Luckily, I married someone who takes great delight in bringing back to life things I have brought to the brink of death (and when he can’t manage it, his mom steps in).

And he had big plans for the backyard garden this year, even before the pandemic. The kale, especially, is a thing of beauty.

Don’t worry — those aren’t weeds. Just garlic chives and other lettuces!

I know what you’re thinking. Kale? Can you just get to those peanut-butter and chocolate cupcakes already?

But I promise — this is absolutely one of our favorite things. It requires a fair amount of chopping, but it holds up in the fridge very well for 2-3 days and is so delicious you’ll forget it’s good for you. Promise.

Kale Quinoa Salad

(recipe courtesy of my friend Spencer — who’s going to be so excited I’m finally typing it up so I don’t have to text him 2-3 times a year for the recipe!)

Ingredients:

For the salad:

  • 1 large bunch kale (approximately 12 – 15 large leaves), washed well and patted dry, with tough center stem removed
  • 3/4 cups quinoa
  • 1 1/2 cups chicken stock or well-salted water
  • 2 cups red grapes, halved
  • 1/2 cup grated Parmesan or manchego cheese
  • 1/2 cup toasted chopped nuts or seeds (I used pecans; the recipe calls for sunflower seeds)

For the dressing:

  • 1/3 cup peanut butter
  • 4 tablespoons olive oil
  • 1 tablespoon toasted sesame seed oil (if you don’t have this, just add another tablespoon of olive oil and all will be well)
  • 3 tablespoons apple cider vinegar
  • 2 tablespoons honey
  • Zest and juice from two lemons
  • 4 cloves or 2 Tablespoons minced garlic
  • Salt and pepper to taste

Procedure:

  • Wash the kale well and pat dry. It tends to get sandy.
  • Remove the tough center leaves and then tear or chop the kale into a relatively small dice (approximately 2-3 centimeters squared, according to William, who apparently speaks metric?)
  • Meanwhile, combine 1 1/2 cups salted water or broth and 3/4 cup quinoa. Bring to a boil and cook uncovered for about 10 minutes, until all the liquid has been absorbed. Some of the quinoa pieces should be translucent. Turn off the heat, cover, and allow to cool for about 5-10 more minutes while you prepare the dressing.
  • Whisk together the dressing ingredients. Season with salt and pepper.
  • In a large bowl, combine the kale, the dressing, and the still slightly warm quinoa. This will wilt the kale a bit (making it not so tough) and the kale and quinoa will both absorb the flavorful dressing.
  • Once the salad is completely cool, add the grapes and Parmesan or manchego cheese.
  • Sprinkle with nuts or seeds of your choice for added crunch. Taste for salt and pepper.
  • This salad is even better after 2 – 4 hours in the fridge, and is still delicious the next day.