
This is actually the second incarnation of this blog… it started as a project waaayyy back in 2009 as a place to save and share recipes for myself and my friends and family. And as much as I love it, it tends to get pushed to the backburner when life gets busy, which, let’s be honest, is all the time… at least until recently.
I originally wrote about this bread back in 2011, but we are still making it, so I decided to share it again with updated instructions. It’s at the other end of the flavor profile from the No-Knead bread I posted last week — soft and cottony, instead of rugged and hardy. It’s meant to be paired with your favorite gumbo or spaghetti, and it keeps great in the freezer. And it can be made in an afternoon, instead of requiring a whole day.
Ingredients:
- 2 packages instant yeast, or 1/2 ounce, or 2 Tablespoons if you buy in bulk
- 2 1/2 cups warm water (110 degrees or so)
- 2 Tablespoons sugar
- 1 Tablespoon salt (if you’re not using Kosher salt, which tends to be coarser, you may want to dial this back a bit)
- 7 cups bread flour (can use all-purpose)
- 2 Tablespoons soft butter, for the bowl
- 1 egg, beaten
Procedure:
- In the bowl of a mixer, bread machine, or a big bowl, combine the yeast, warm water, and sugar. Let it sit for about 5 minutes — you should see the yeast begin to foam.
- Mix in the salt, then add the bread flour, 1 cup at a time, reserving the last 1/2 cup for when you roll it out later. This will make a very stiff dough. You can do this with the bread hook of a stand mixer, a bread machine, or a spoon, if you want a bicep workout.
- Use the butter to grease a very large bowl. Dump the dough into the bowl (you may need a spatula), and turn it once to coat it with the butter. Cover with a damp dishtowel or plastic wrap and allow to rise in a warm place for 1 1/2 to 2 hours.
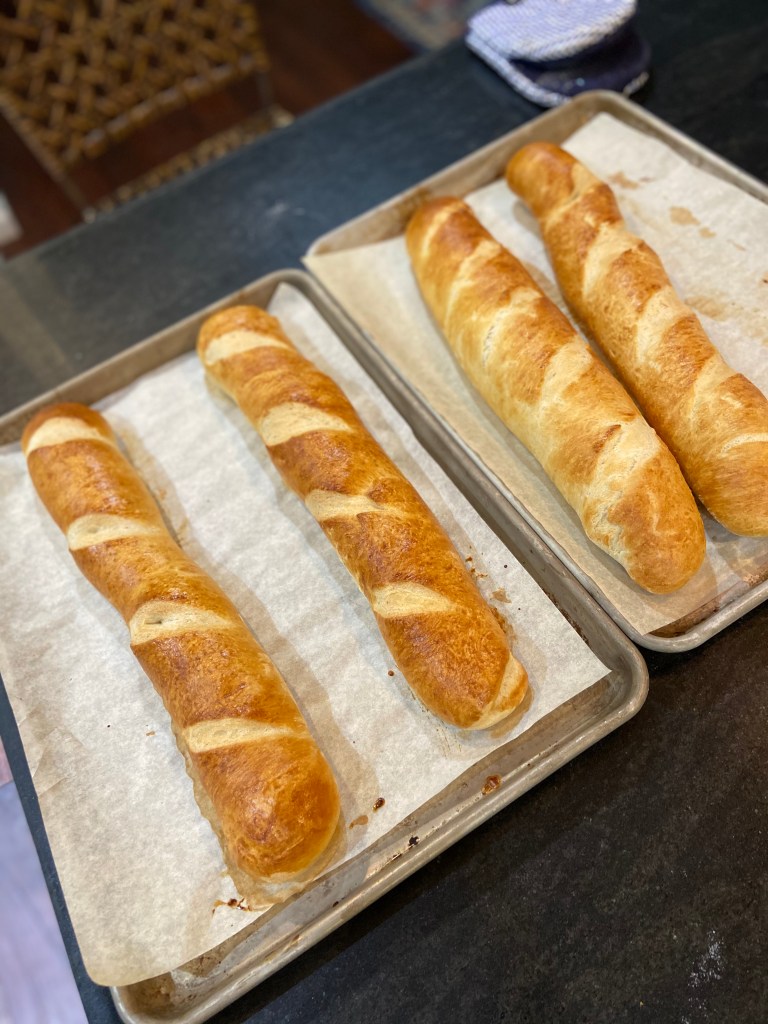
- Once the dough has doubled, use the remaining 1/2 cup of flour to generously flour your countertop. Gently press the dough to deflate and then dump it onto your floured surface (kids love to help with this part). Knead it well and then divide it into 4 equal sections. Using a rolling pin or your hands, shape each section into a long, skinny baguette.
- Place the four baguettes onto two baking sheets lined with parchment paper (or you can grease them with butter or use Baker’s Joy, Pam with Flour, etc.)
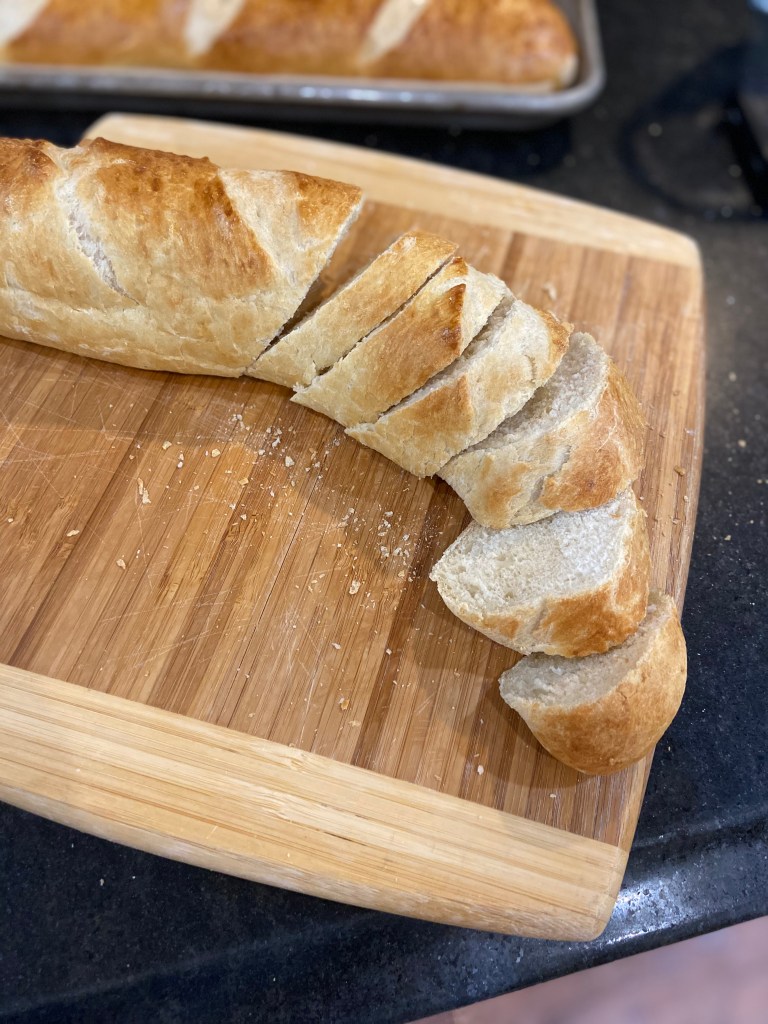
- Using a sharp knife, score the top of each baguette several times. Then, brush each baguette with the beaten egg.
- Preheat your oven to 425. Allow the loaves to rise again, uncovered this time, for about 30 minutes while your oven preheats.
- Bake the loaves for 20-25 minutes, until they are brown and sound hollow when you rap on them. Depending on how your oven heats, you may want to rotate the loaves in the middle.
- For extra crust, mist the loaves with water a few times during the first 10 minutes of baking.
Assuming you don’t have a constantly-starving teenager in your house, you may not need all 4 loaves at once. Once they have cooled, wrap each loaf tightly in aluminum foil and freeze for up to 3 months. To reheat, place them in a 350 degree oven, still wrapped, for 10 minutes, then remove the aluminum foil and bake for another 5 minutes.
Enjoy!
Oh, and here’s my favorite picture from the original post. My baby sure has grown up A LOT since then, but he still LOVES this bread (possibly even more than he did originally — he’s hungrier these days).